
'Damascus'-pattern Knife

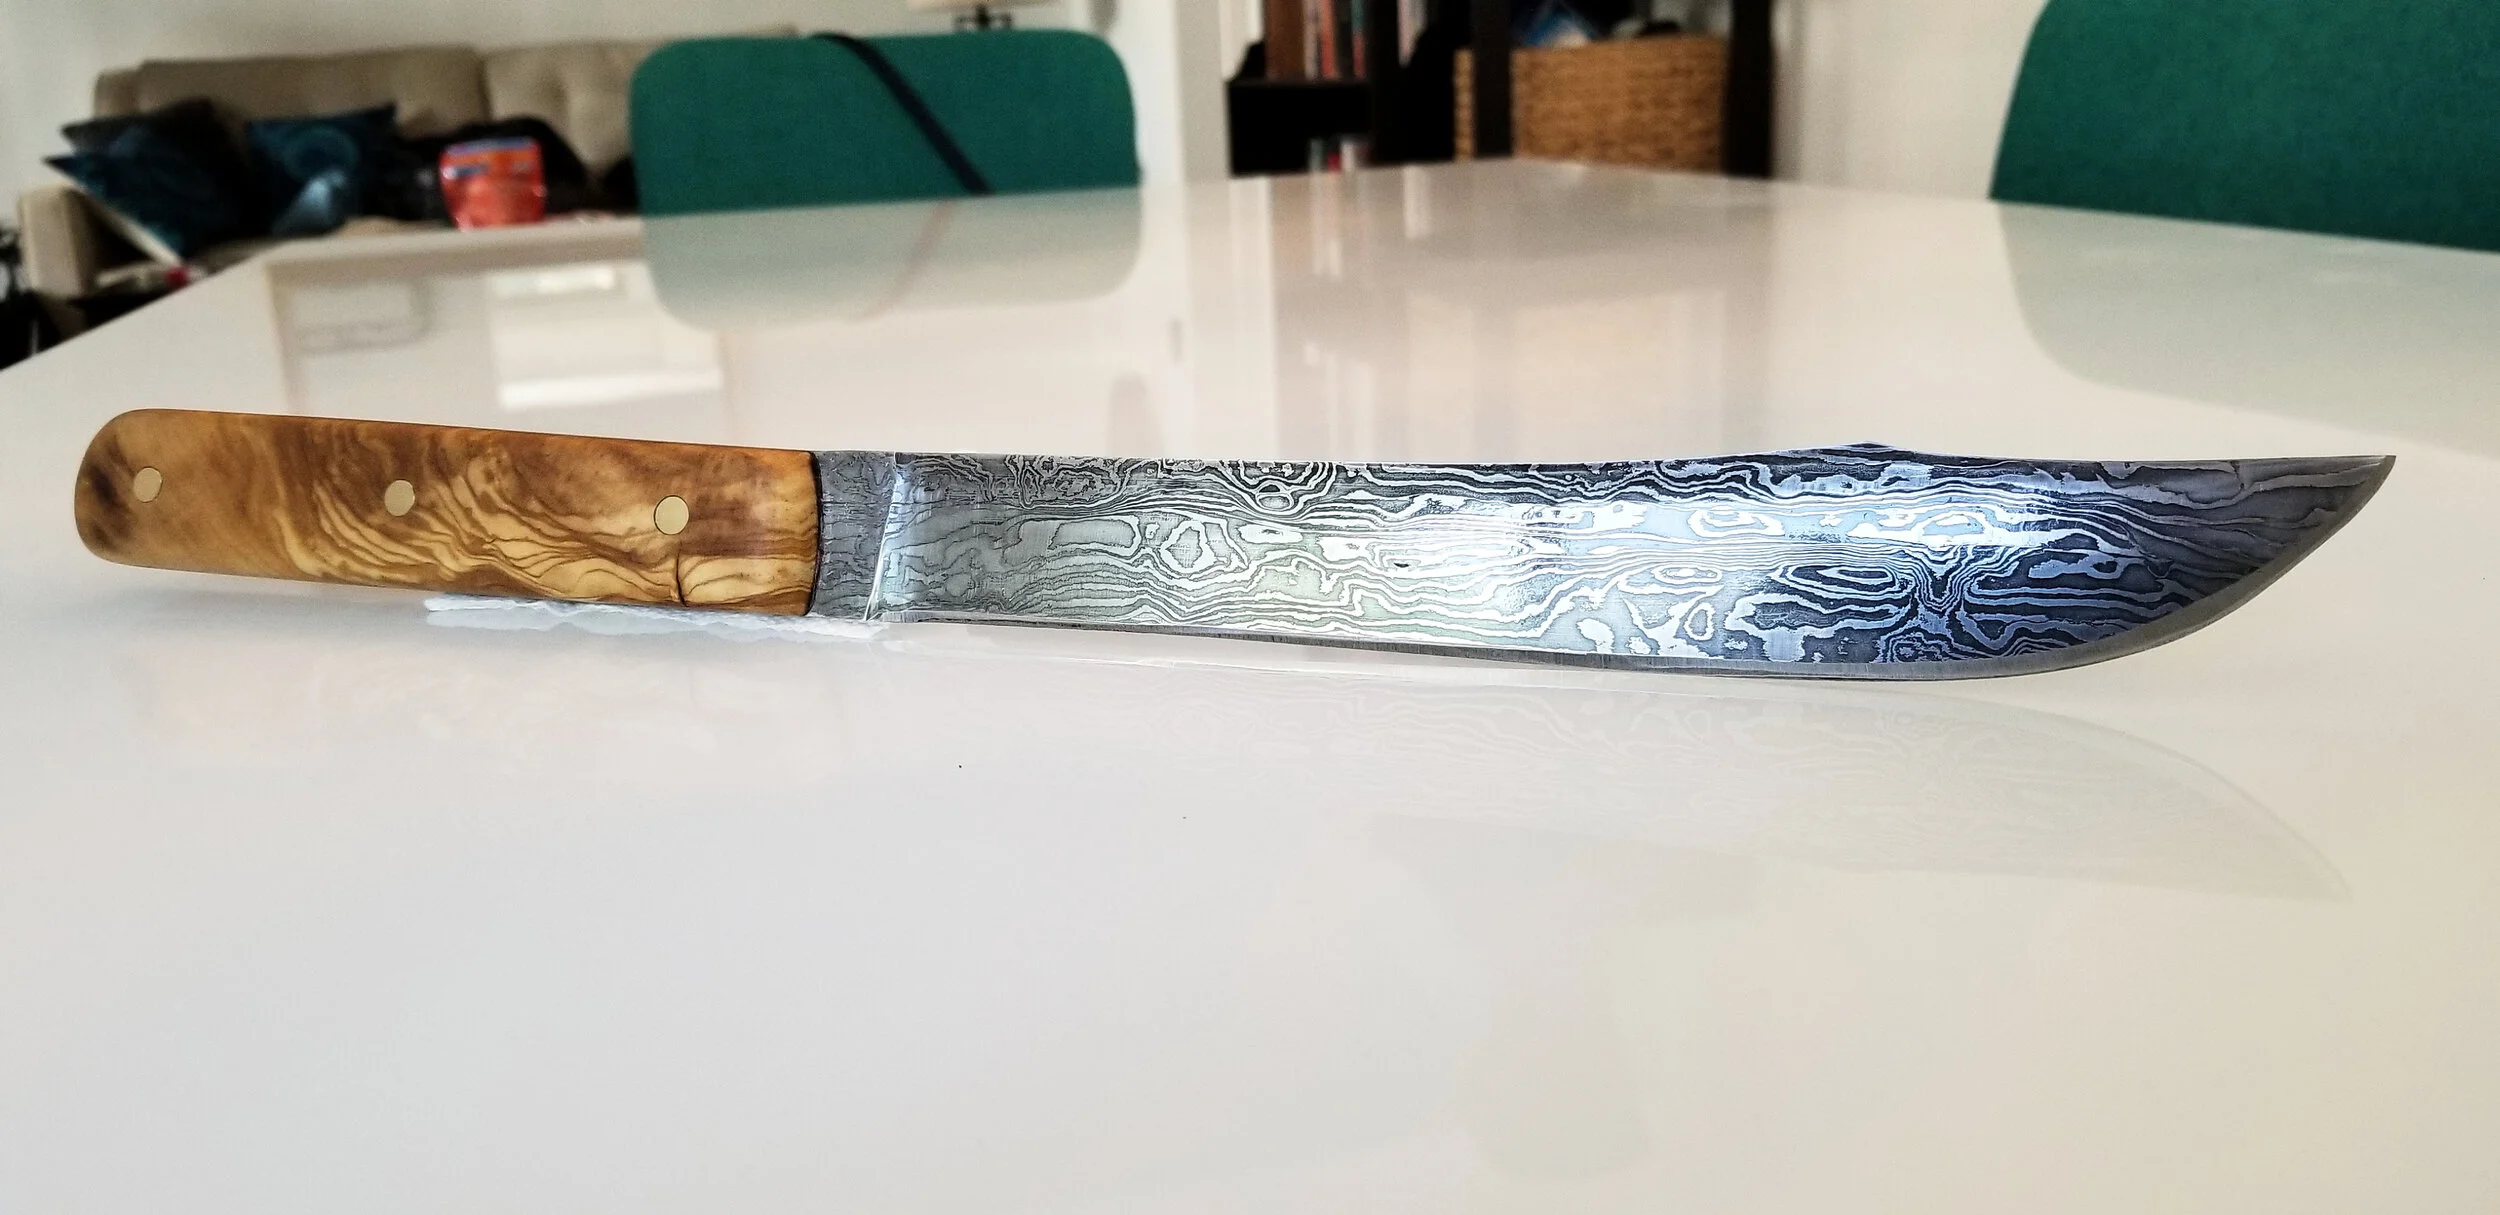
Photo 1: A nearly 40 cm long patterned steel blade I made, with mesquite handle, and a full tang.
Above is a photo of a knife I made from bars of 1084, and 15N20 steel. The handle I made from a piece of mesquite, attached to a full tang with 3 brass dowels and some epoxy.
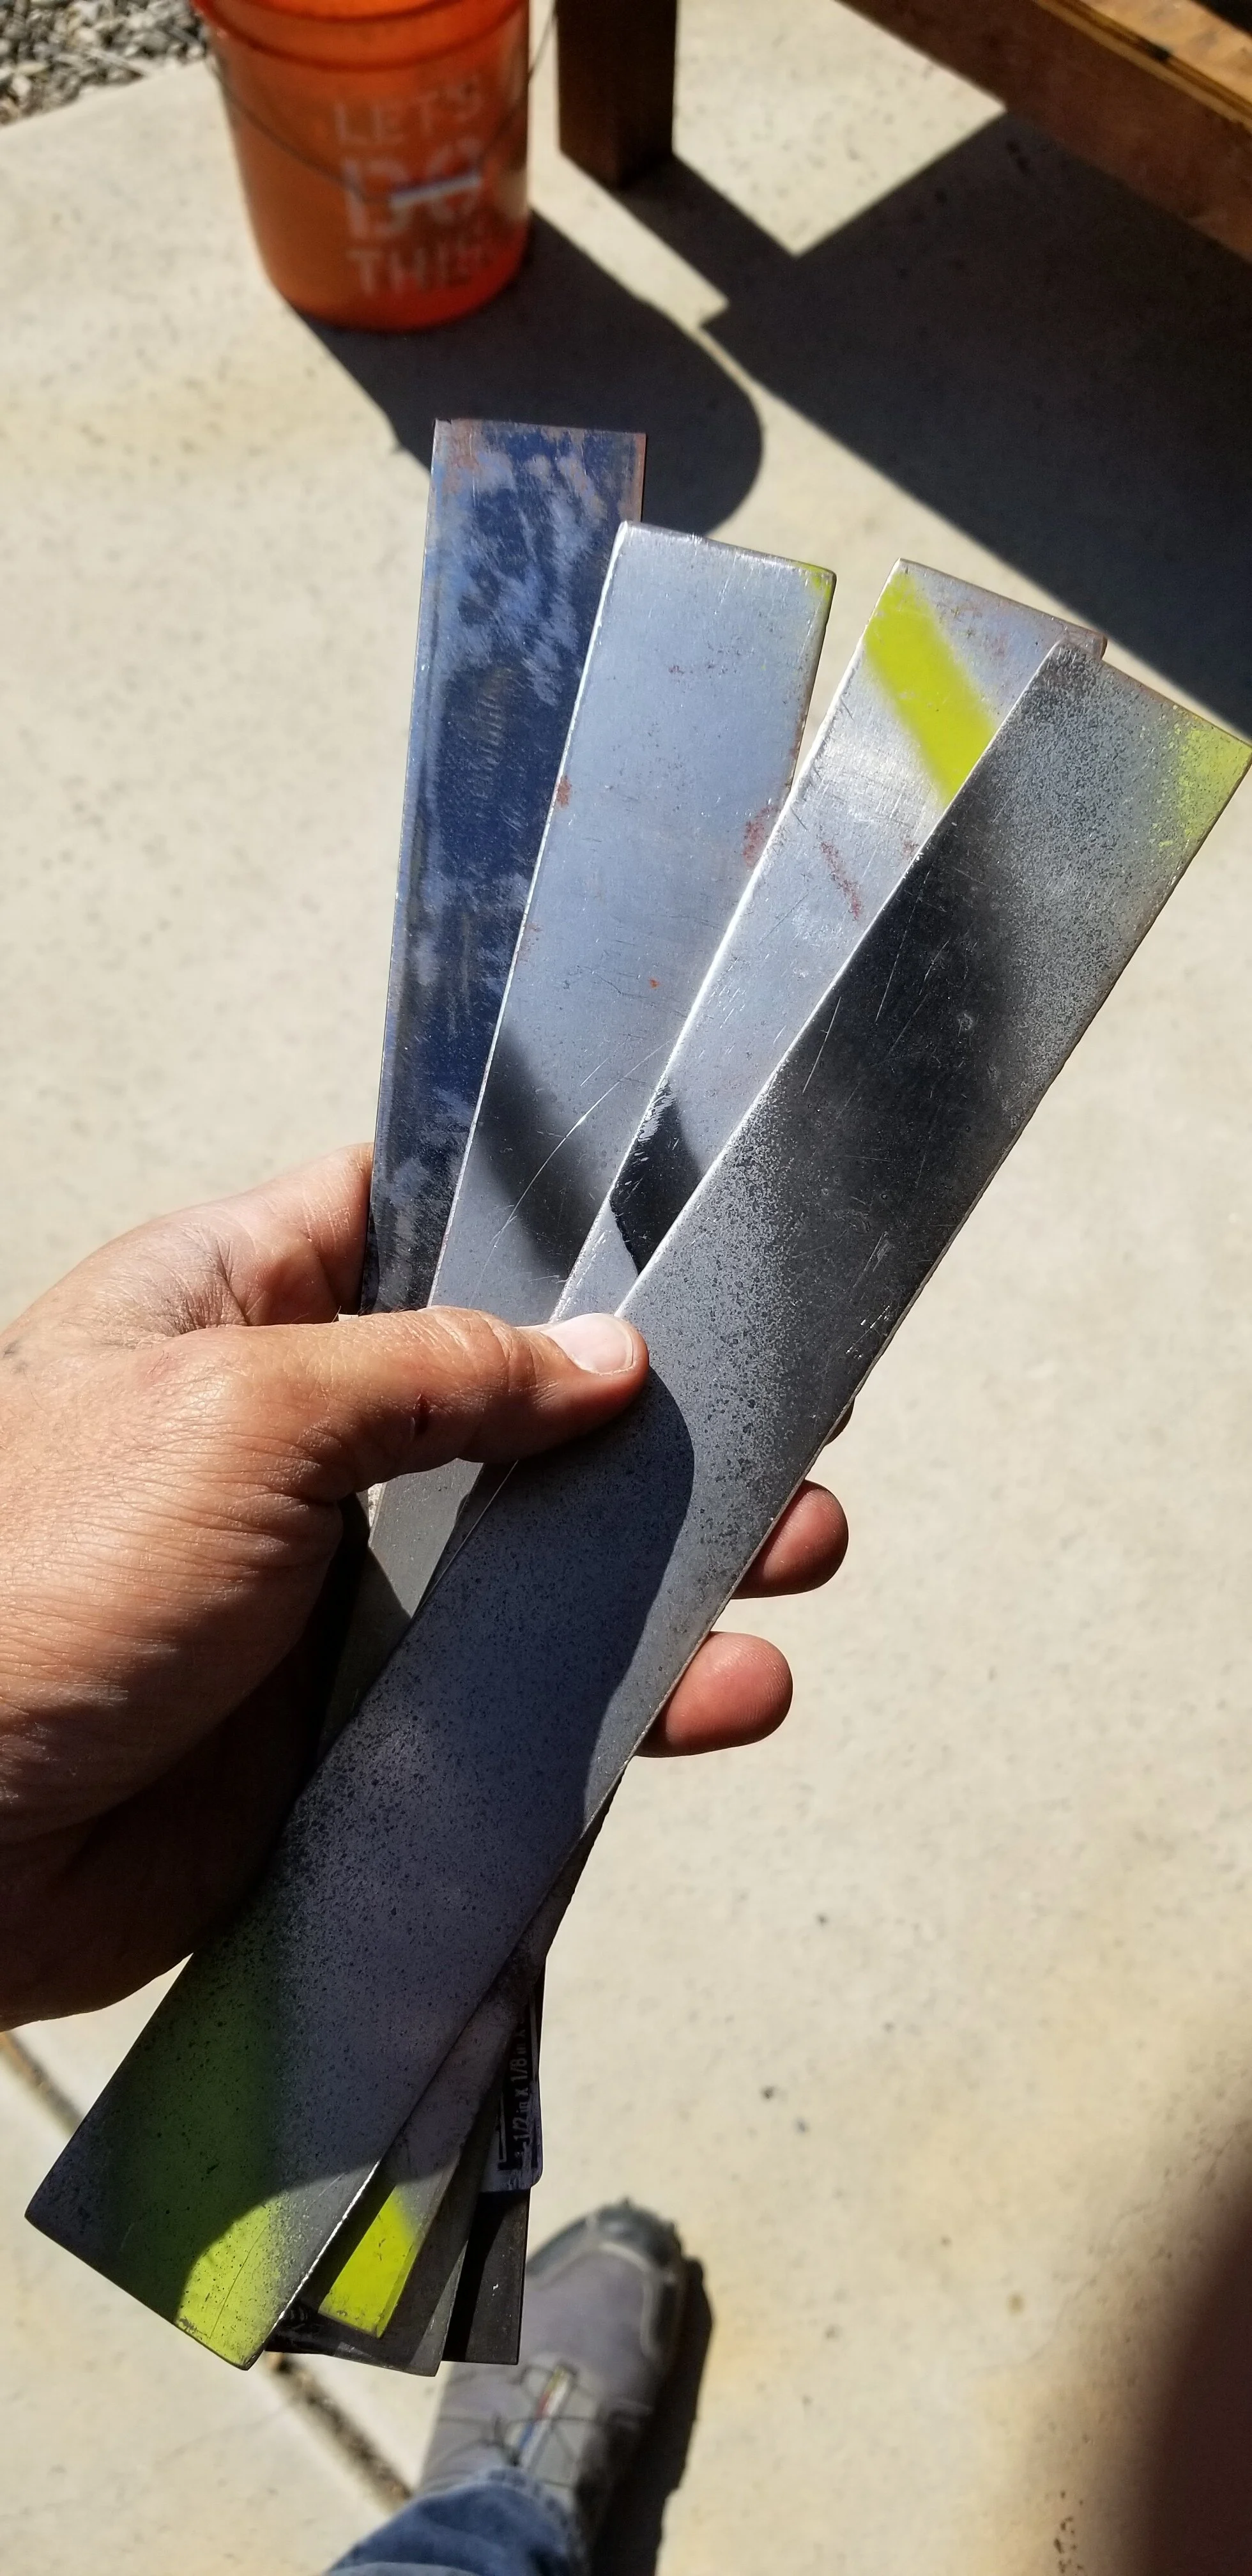
Some of the steel I started with.
First thing I did was clean up the steel I had using sandpaper, and acetone. Then I cut them into equal lengths, and widths. I alternated 1084, with layers of 15N20, and spot welded the sandwiched pieces together. I then welded a short piece of rebar on one end to use as something to grab with tongs when I started forging.
Once all this was done, I put it all in the forge to heat it up to temperature for forge welding. Forge welding is basically the process of heating two (or more) metals the same, or different alloys, then hammering them together into a single, solid piece.
It’s how folks forged in the days before the Industrial Revolution. There are a lot of online videos, and books on how to forge weld, but they’re all pretty much useless in the end, because how hot you get your pieces, and how hard you hammer them together will vary, depending on what alloys, and how many layers you’re working with.
If you don’t heat enough, or heat too much, hit too soft, or hit too hard, your pieces won’t forge up. I’ve found over the years that the temperature, and hammer impact strength is truly a ‘feels like’ sort of thing. For me, it’s like shooting any style of traditional bow. You don’t hold the bow up fully drawn and aim with your one opened eye. You see the target with both eyes, pull and release naturally.
A lot of guys use kerosene to flux their piece before putting it in the forge (the piece is cold when they dip it obviously). I’ve not tried this method yet, but plan to for my next project (which will be a Damascus-patterned battle axe). So far, all I’ve ever used is regular old borax; Twenty Mule Team Borax is cheap, and lasts a good long time. I just sprinkle it between the layers before putting the stack of steel into the forge.
Borax does cause some annoying black scale to form, and I hear kerosene reduces this unwanted effect, so I’ll need to get with the program and upgrade my methods!
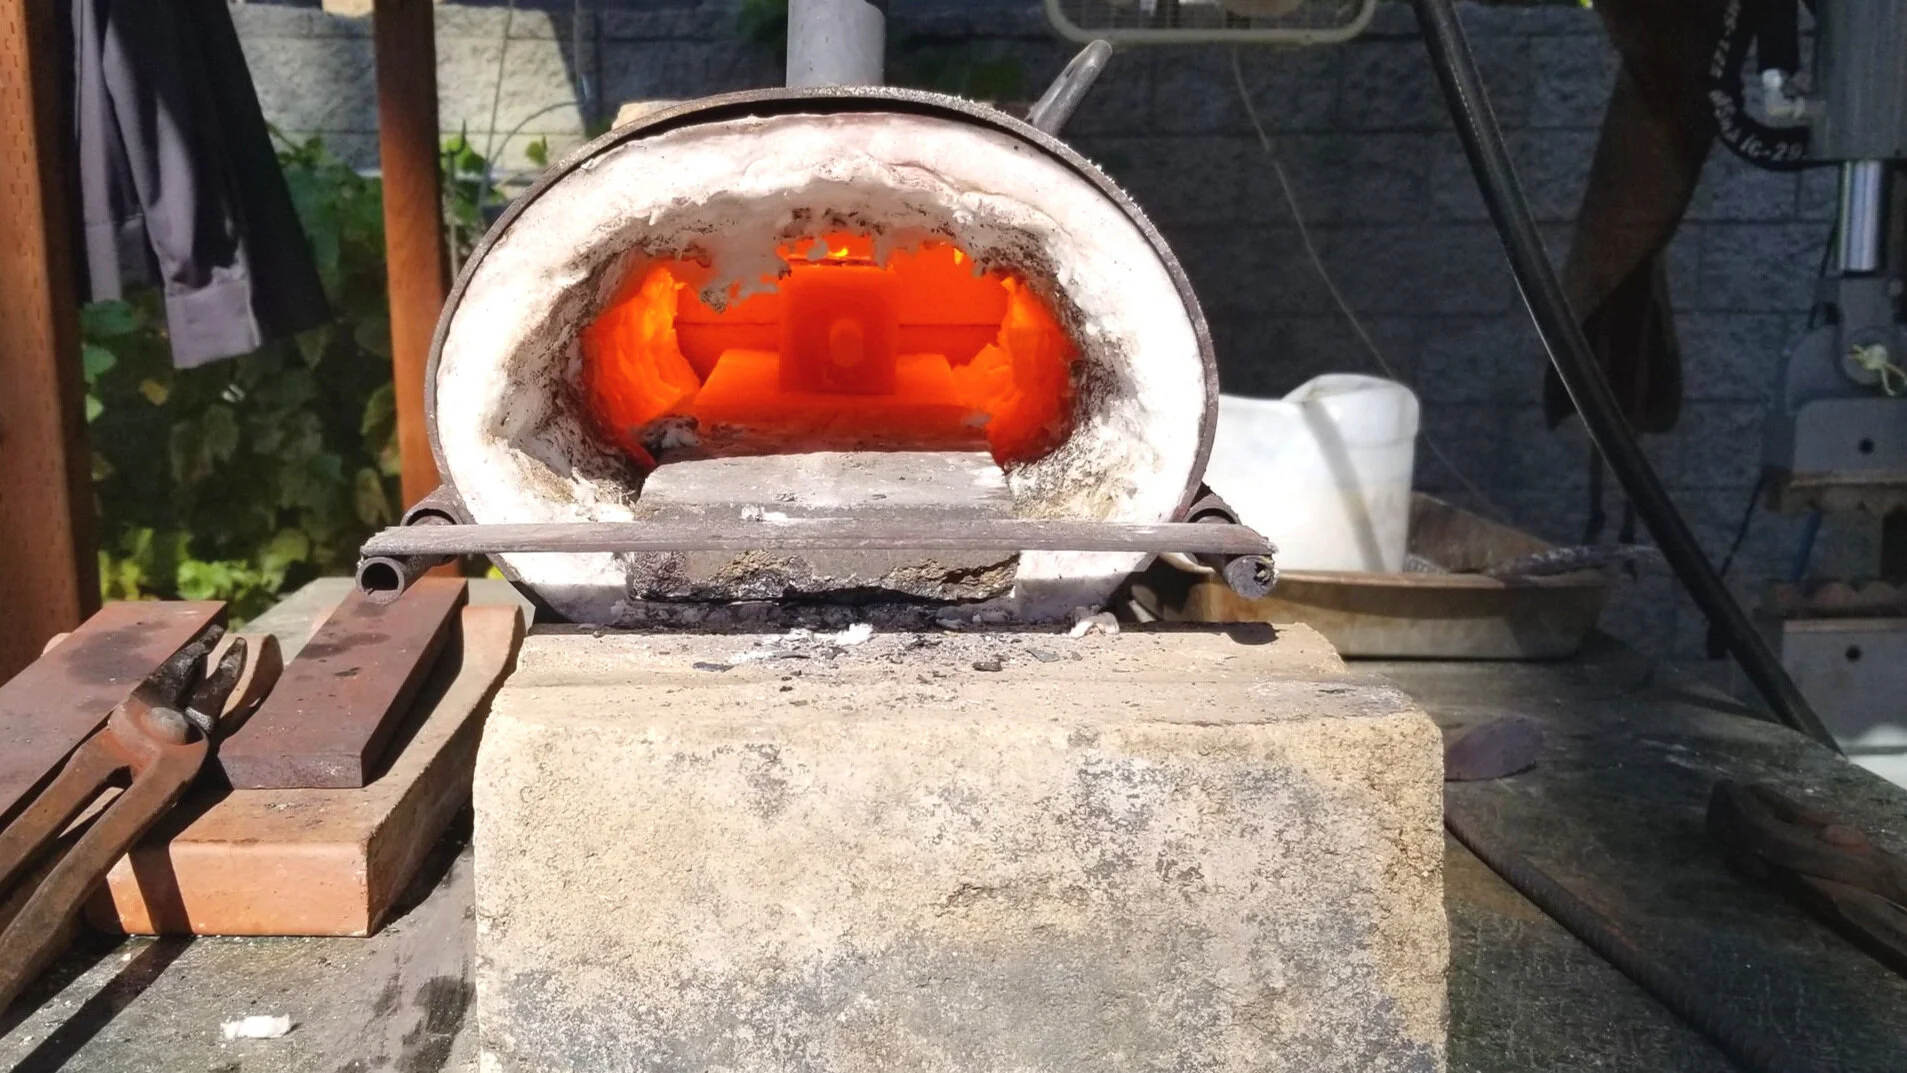
This piece is still too ‘red’ looking for forge welding. It needs more time in the fire.
When it comes to forge welding, I’ve learned to know the right temperature by the color of the steel as it glows in the forge. I can’t tell you the exact color, but can say that it isn’t red, or yellow, but a fairly bright orange glow. I just know when it’s ready. I like to turn my piece over and over in the forge when first heating it to ensure the deeper layers come up to temperature evenly.
When I pull the piece out, I’m quick to get it to the anvil and waste no time laying down the first hammer blow. Depending on the size of the piece, I generally like to use a 1500-gram hammer like this one. I’ve learned to know how hard to hit over the years with this particular hammer, but of course folks can use whatever weight hammer they’re comfortable with. I change hammers throughout the smithing process depending on what I’m trying to achieve with the piece. But for forge welding, the 1500 gram is my go-to hammer.
I let the hammer do a lot of the work, adding just a bit of force to each strike, but not too much. I like to strike from a corner, then quickly, but precisely work each subsequent strike from there until I’ve hit every square centimeter evenly, and only once. I never strike twice over the same spot, and on the first go, I never turn the piece over. I work fast because I want every strike to hit the piece while it’s at the right temperature. Too slow between strikes, and the piece will cool, and not forge up.
It’s usually forged up after the first heat, but I don’t trust I’m that good, so sprinkle the edges with some mroe borax, and put the piece in for a second heat. The second time around, I hit with a bit more force, but still evenly along the length of the piece, this time flipping it as I go. It seems to work well for me. At this point I know I have a solid billet, and can strike as hard as I like from there on out. I can feel and hear the difference between layers of steel, and when those layers become one with each blow of the hammer.
It sounds less like a ‘thud’, and more like a ‘ping’, and the hammer strikes feel more like you’re hitting a chunk of solid steel, and less like you’re hitting a tightly-folded newspaper I guess.
At any rate, I like to draw my piece out, while keeping a good square-ish shape to it. I’ve found this to work really well for me. A lot of guys don’t like to draw their metal out as much, preferring instead to maintain the width of their final blade. But I’m not that good. Here’s the piece after I’ve finished drawing it out:

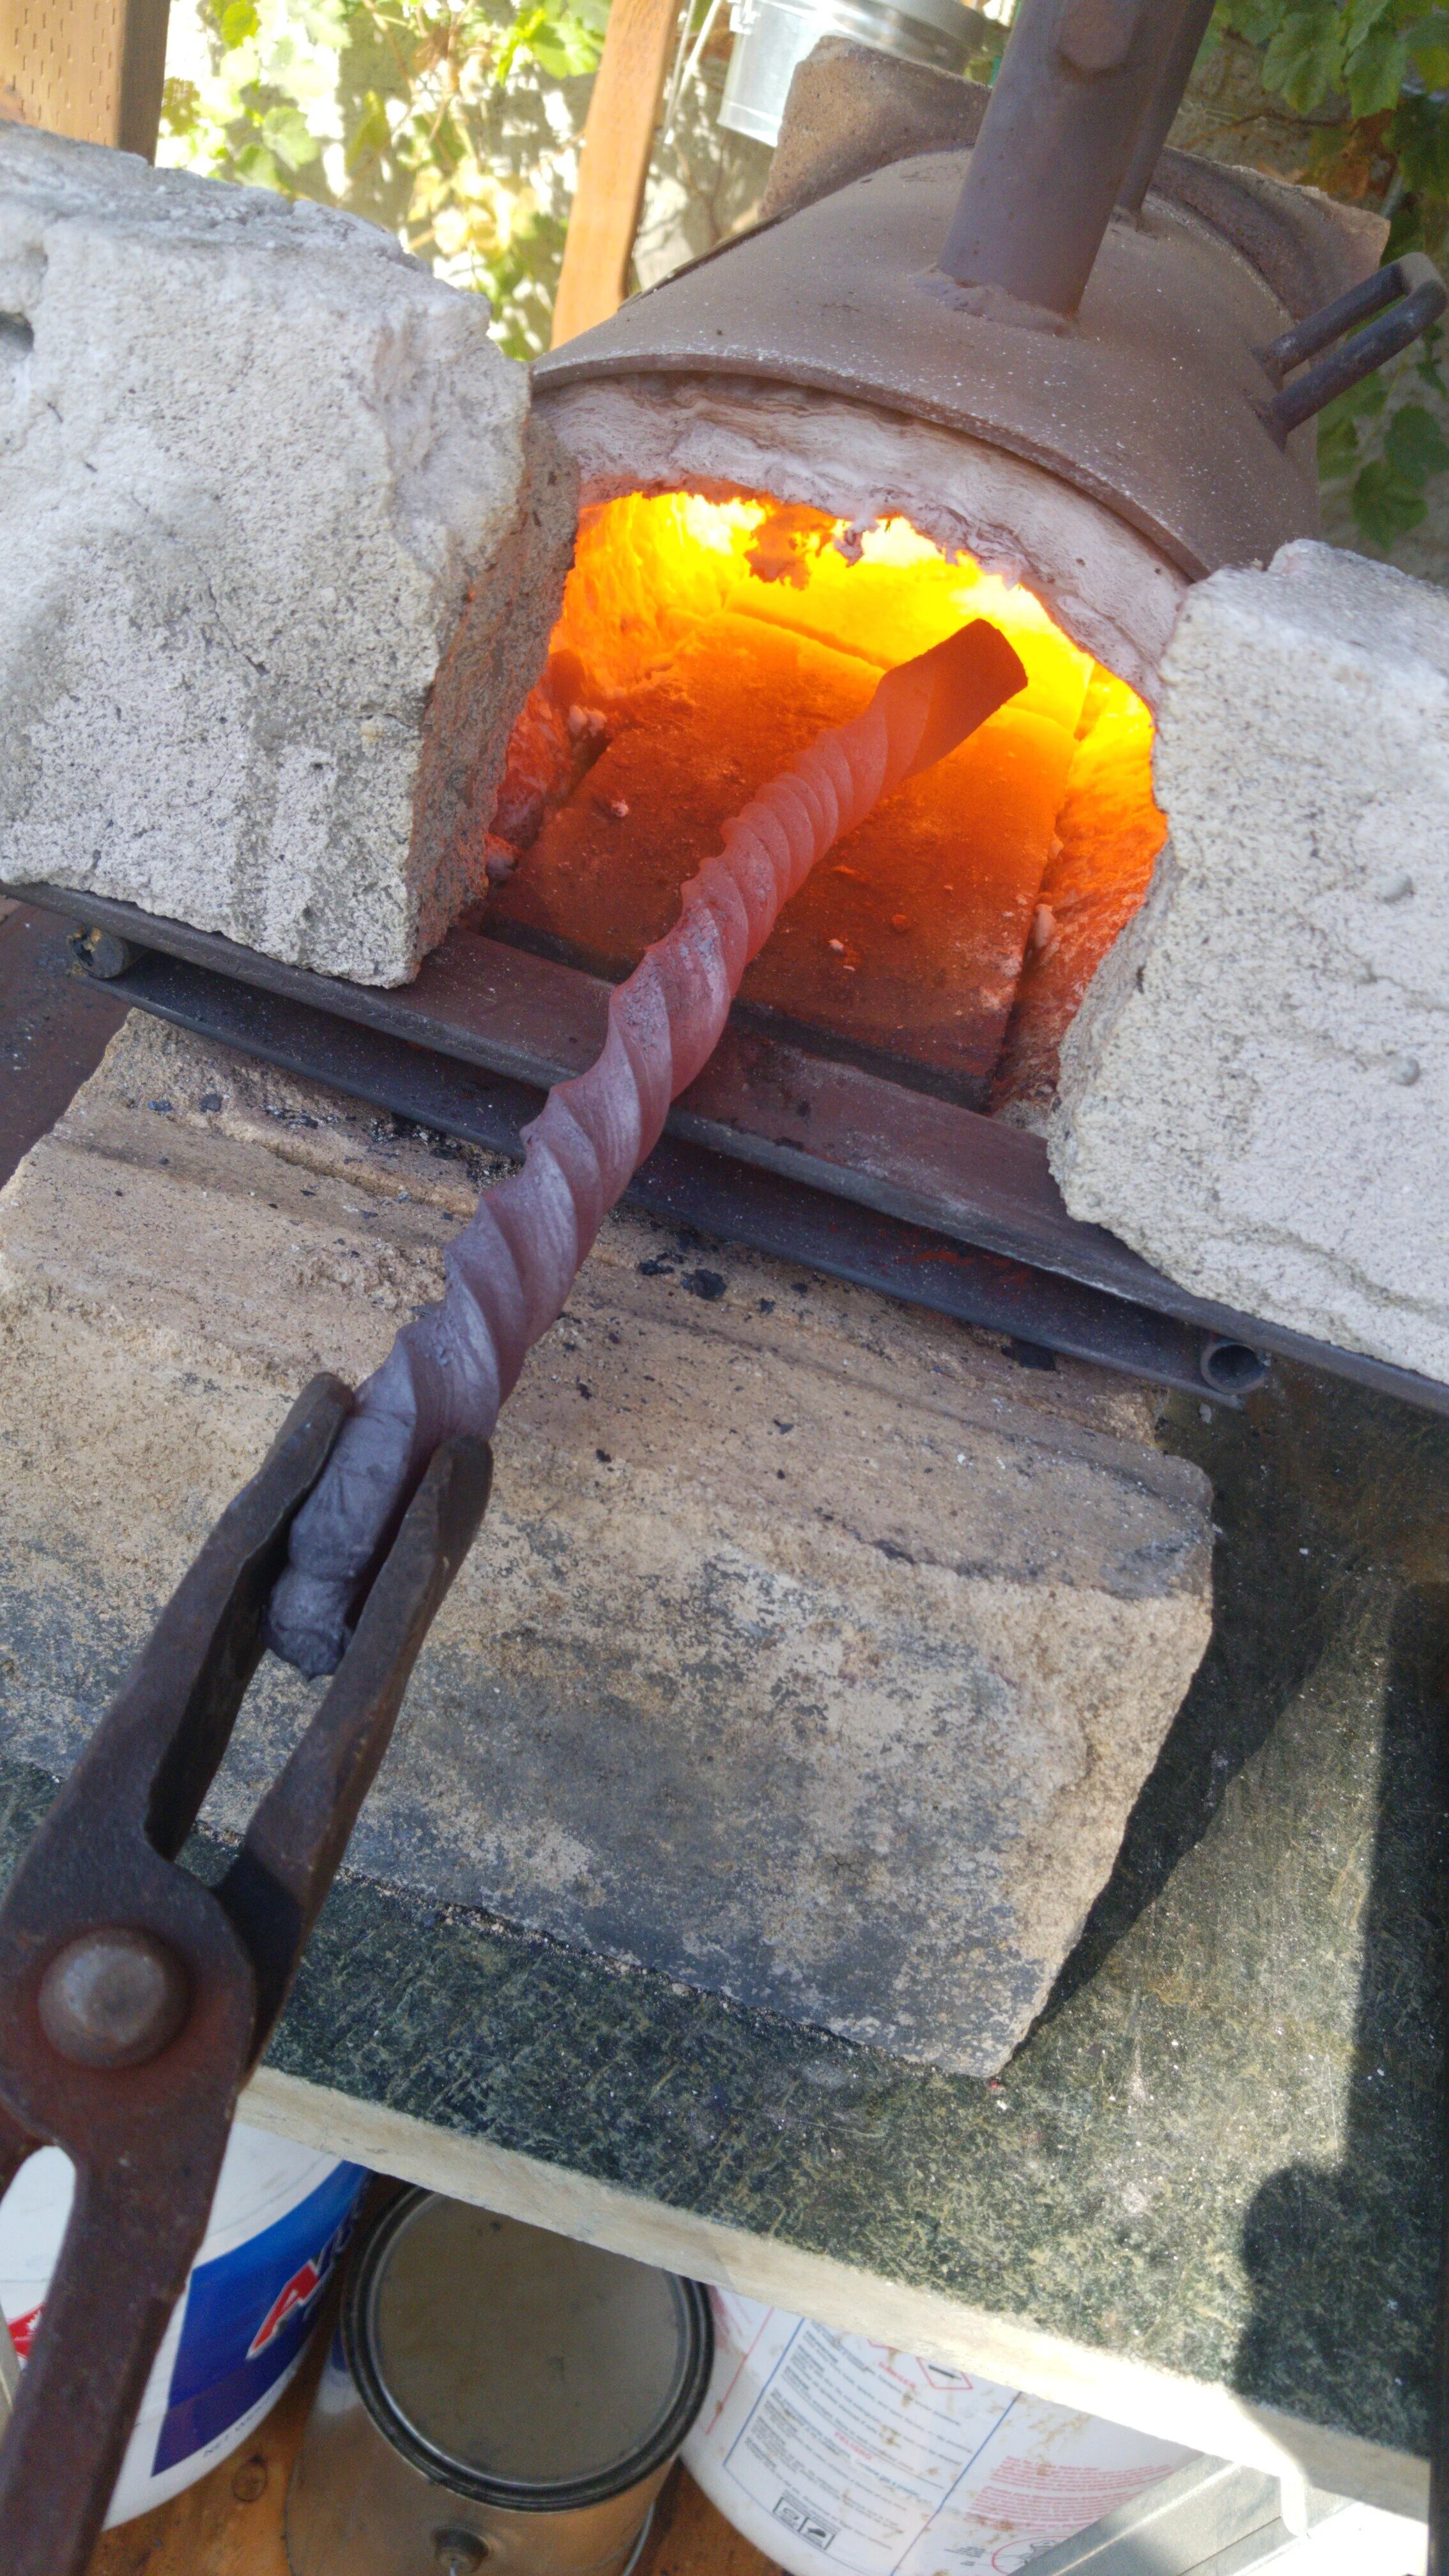
At this point, I decided to twist the billet. I heated it up, stuck it in the vice, then with a pipe wrench that I welded an extra arm to, I twisted the steel through its entire length. Here’s a photo of it back in the forge after twisting.
I reheated the twisted steel, then hammered it back square. I was curious to see how the pattern was looking, so grinded a bit on one side to have a peek; it was looking pretty interesting as seen below:
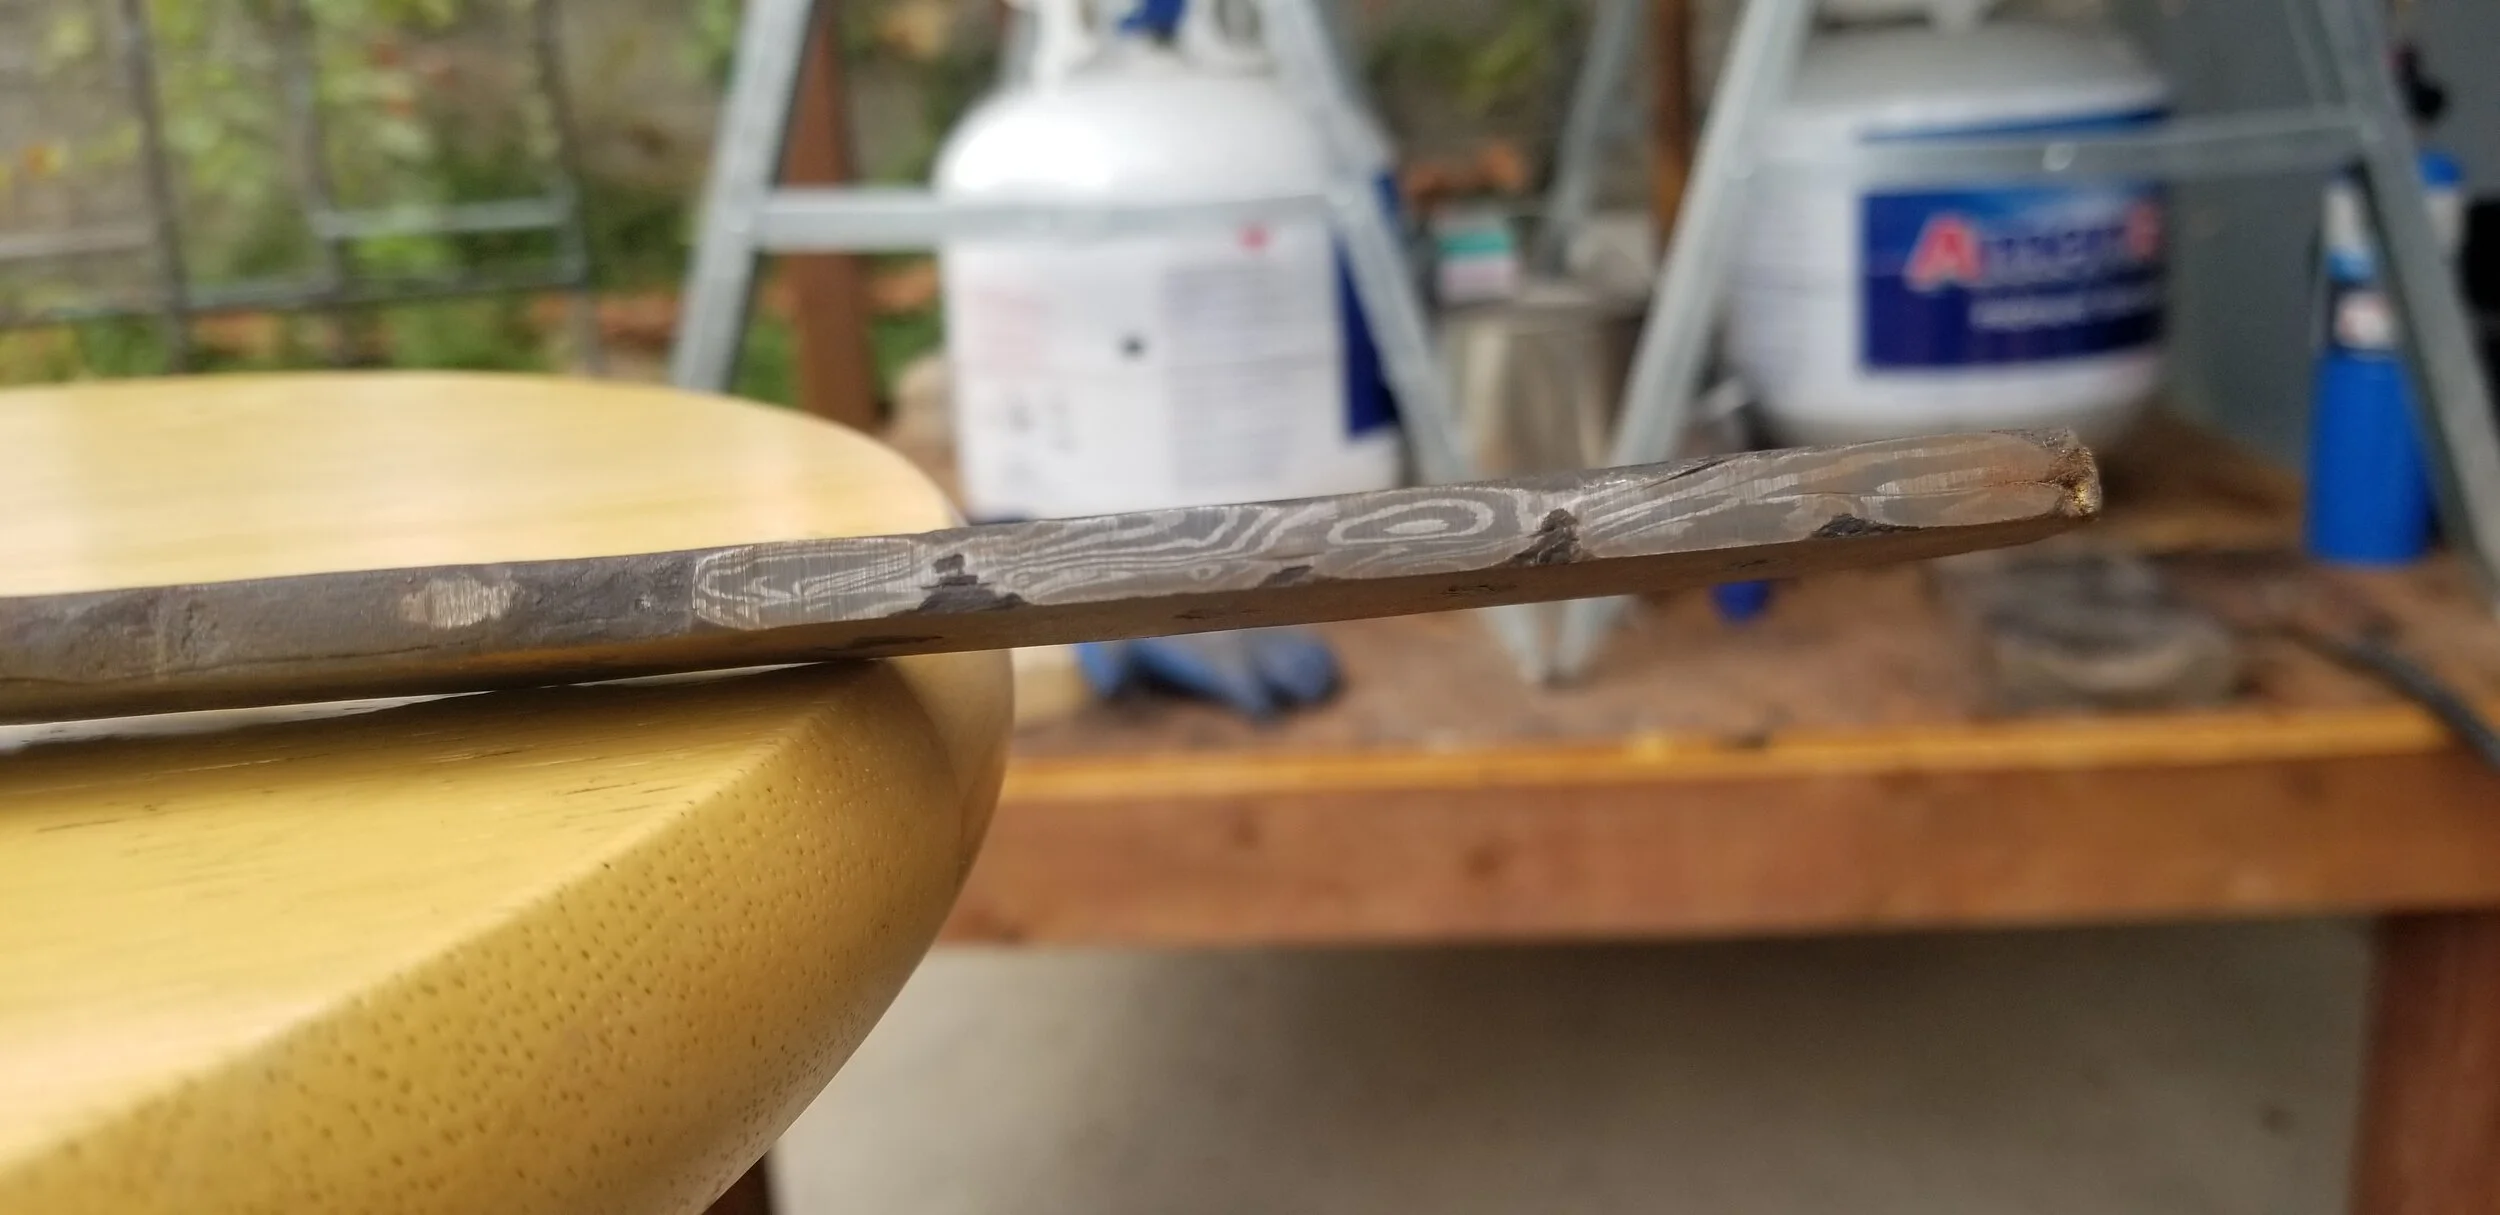
At this point I cut the bar into 3 separate pieces, then cleaned up their surfaces with sandpaper, and acetone, and sandwiched them together; alternating directions because… why not!? I have no idea what it’d do, if anything, to the pattern! I just felt it was an artsy thing to do ha ha..
I spot welded the pieces together, then back in the forge to be heated to temperature, then I forge welded those pieces together again into a single billet. Then I drew that piece back out on the anvil, and gave it another twist, this time going in the opposite direction from the original twist. Again, I had no idea what this would do pattern-wise, but I felt it was a unique approach that might garner some cool results. But had no idea to be honest!
Once I finished the second reverse twist, I hammered it out square again, then cut it in half, and spot welded them together after flipping the second piece in the opposite direction, and upside down… if that makes any sense. Again, I was making it up as I went!
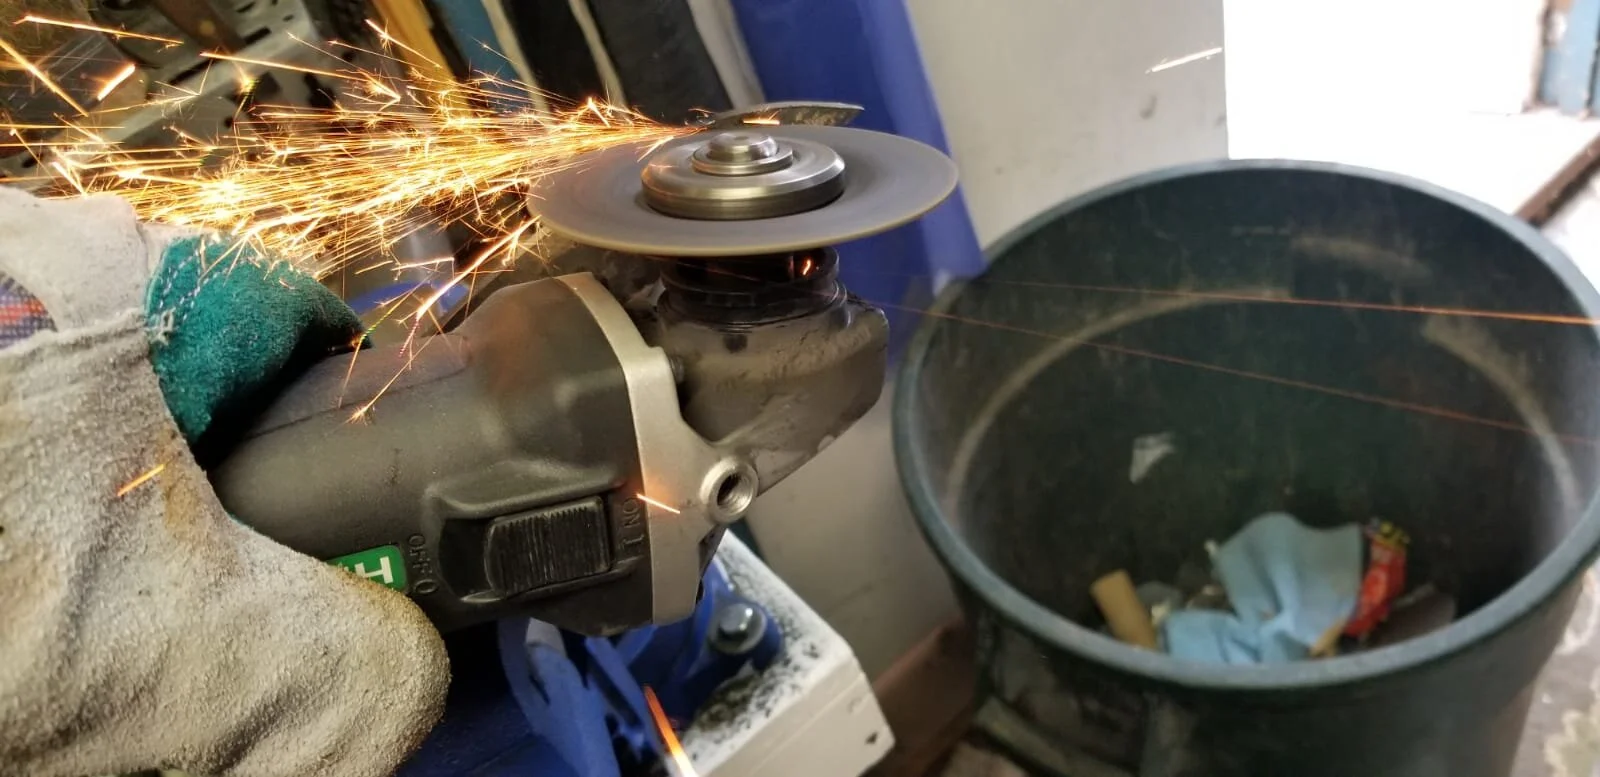
I forge welded these together, then hammered it all back out, this time to just over 40 cm in length, and a width of about 5 cm, and a thickness of about 3 or 4 mm. That was it for the forge. This was the final piece I took to the drawing table. I used a sharpie to draw out the shape of the knife I wanted. I wiped away mistakes with a paper towel dipped in acetone. After several variations, I decided on the final shape (seen in the first photo at top).
I used a grinder with a cutting wheel to cut out the general shape as seen below:
Now it was time to temper the piece in the oven at 400 degrees Fahrenheit. Let the piece sit in there for a couple hours, then pull it out and let it air cool to room temperature and repeat. Tempering toughens the iron-based alloys (1084 & 15N20), thus hardening the piece.
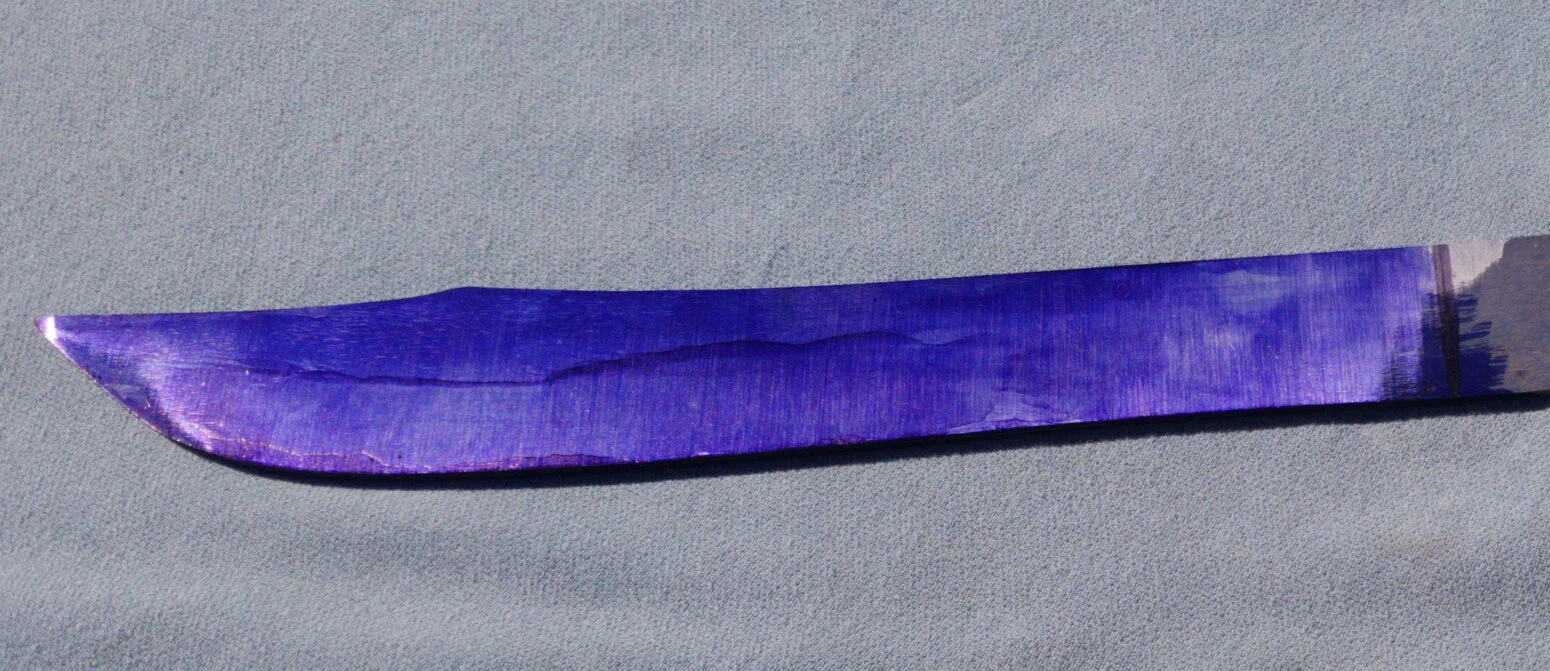
Next, I needed to bevel the blade on either side. To do this evenly, I marked the blade down the length of its thickness, such that the mark was in the middle. Then I colored the blade with blue ink; the idea is that when I bevel the blade, I’ll easily be able to see imperfections, and evenness by looking for areas where the blue ink wasn’t being removed. Low spots, for instance, would still have blue ink, while higher spots will have had their ink removed.
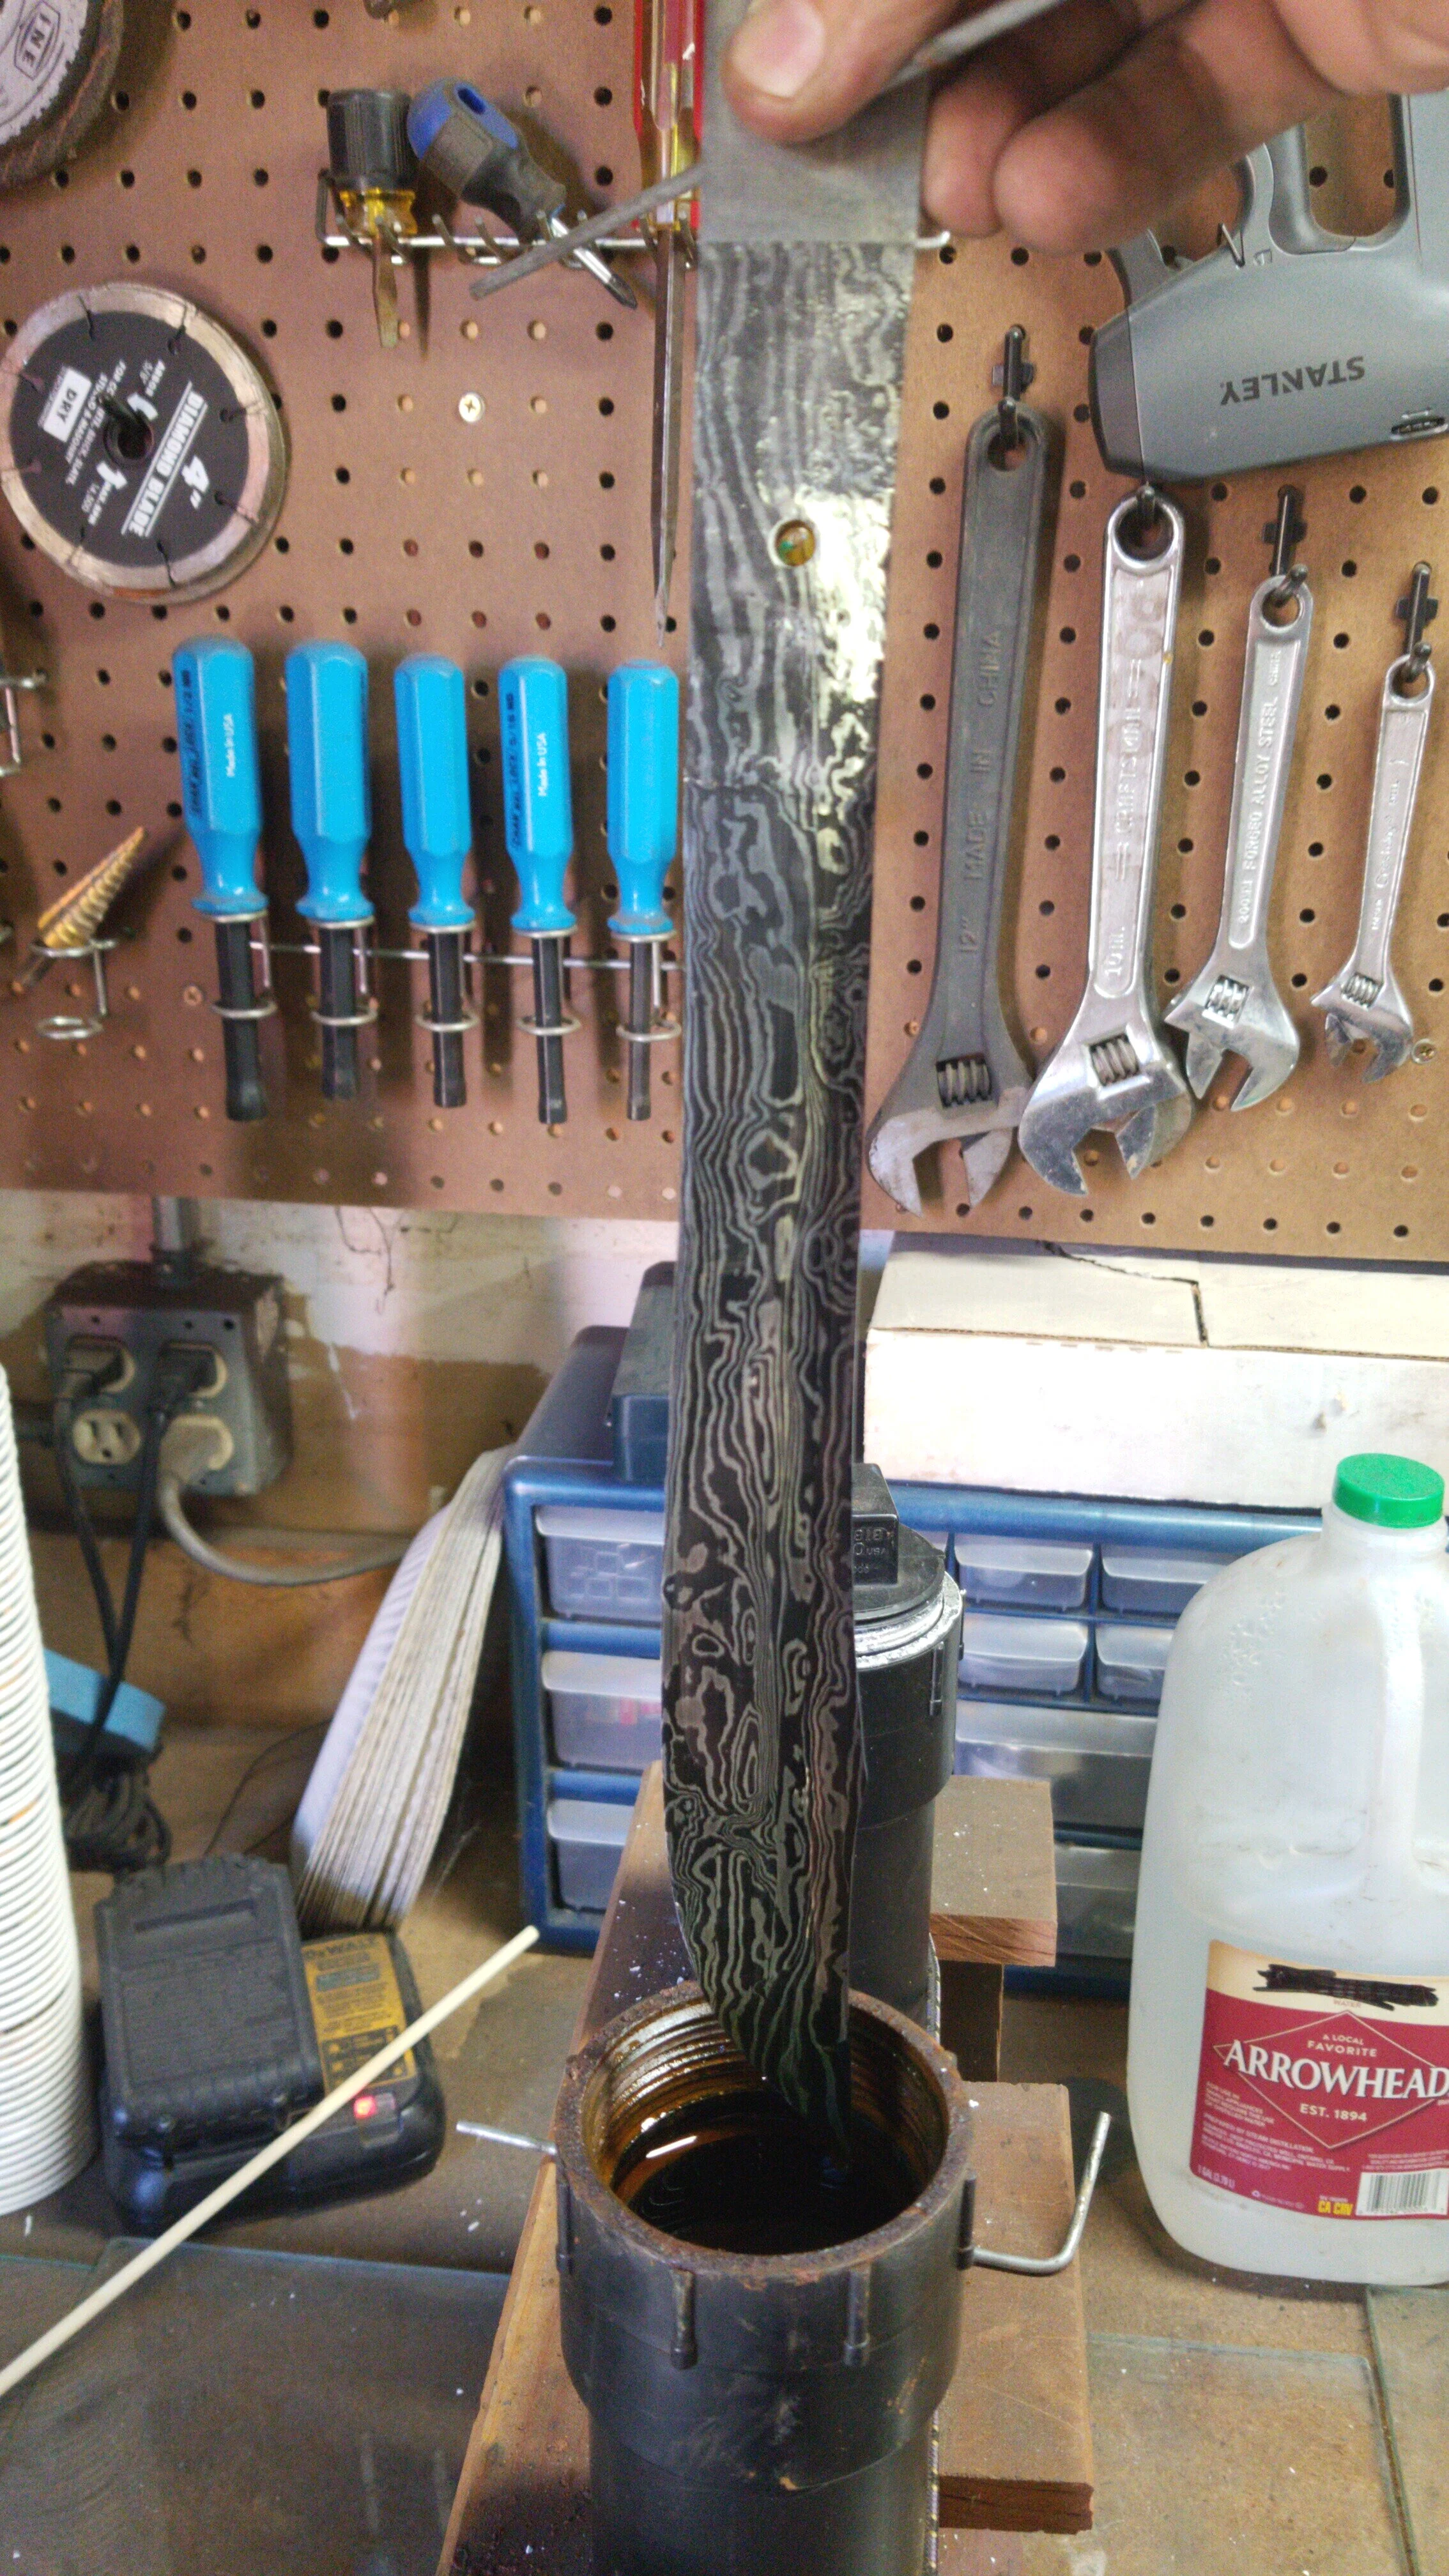
The blade as it looked fresh out of the ferric chloride.
Next, I took the piece to the belt sander to put a bevel on either side of what would be the blade. I started with 60 grit belts, and gradually worked my way to finer and finer grits, ending with a 1000-grit belt. Once the bevel was shaped, and a shoulder cut in near where the handle would go, I etched the blade side in ferric chloride.
I left it in the ferric chloride for about 45 minutes. I neutralized in a solution of sodium bicarbonate, then wiped it clean. I have to say, I didn’t expect such a cool pattern to come out! I was pleasantly surprised!
At this point, the knife was ready to get a nice sharp edge. This was done using the belt sander, and sharpening stones.
The final step was deciding what to use for a handle. I had a full tang, and wanted to mount a nice piece of wood to it. With the kind of patterns this blade had, I really wanted a piece of wood that had equally interesting grain patterns.
Fortunately, my friend had piece of mesquite sitting around in his garage. It was given to him by a friend of his, and I’m not sure where that fella got it from, but I was really excited to have at it!
At first, it looks like any other boring, old piece of wood:
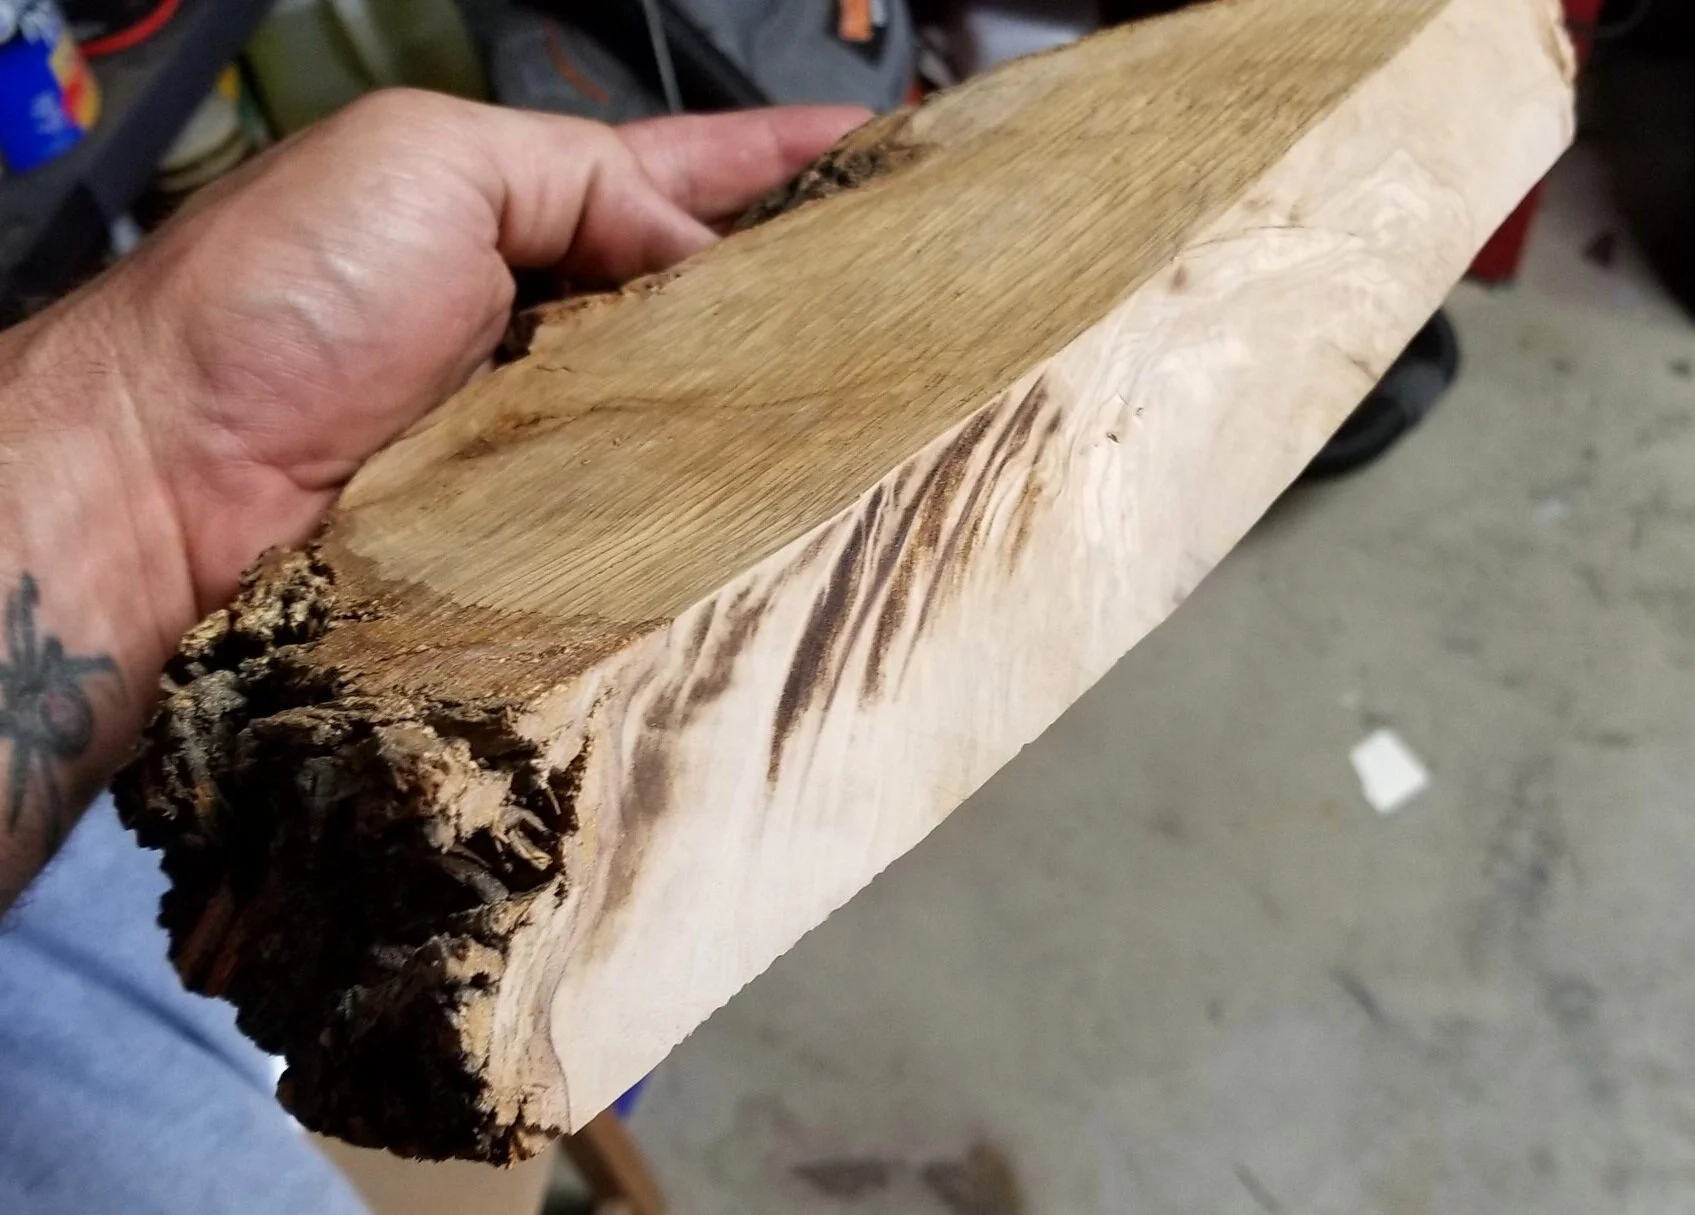
This is the chunk of mesquite that caught my eye. I noticed a really cool grain pattern in the cut side of this piece, and decided this would do for the handle.
First, I cut what I needed out of the chunk of mesquite, then drew up the general shape of the handle with a sharpie, and took that over to the bandsaw:
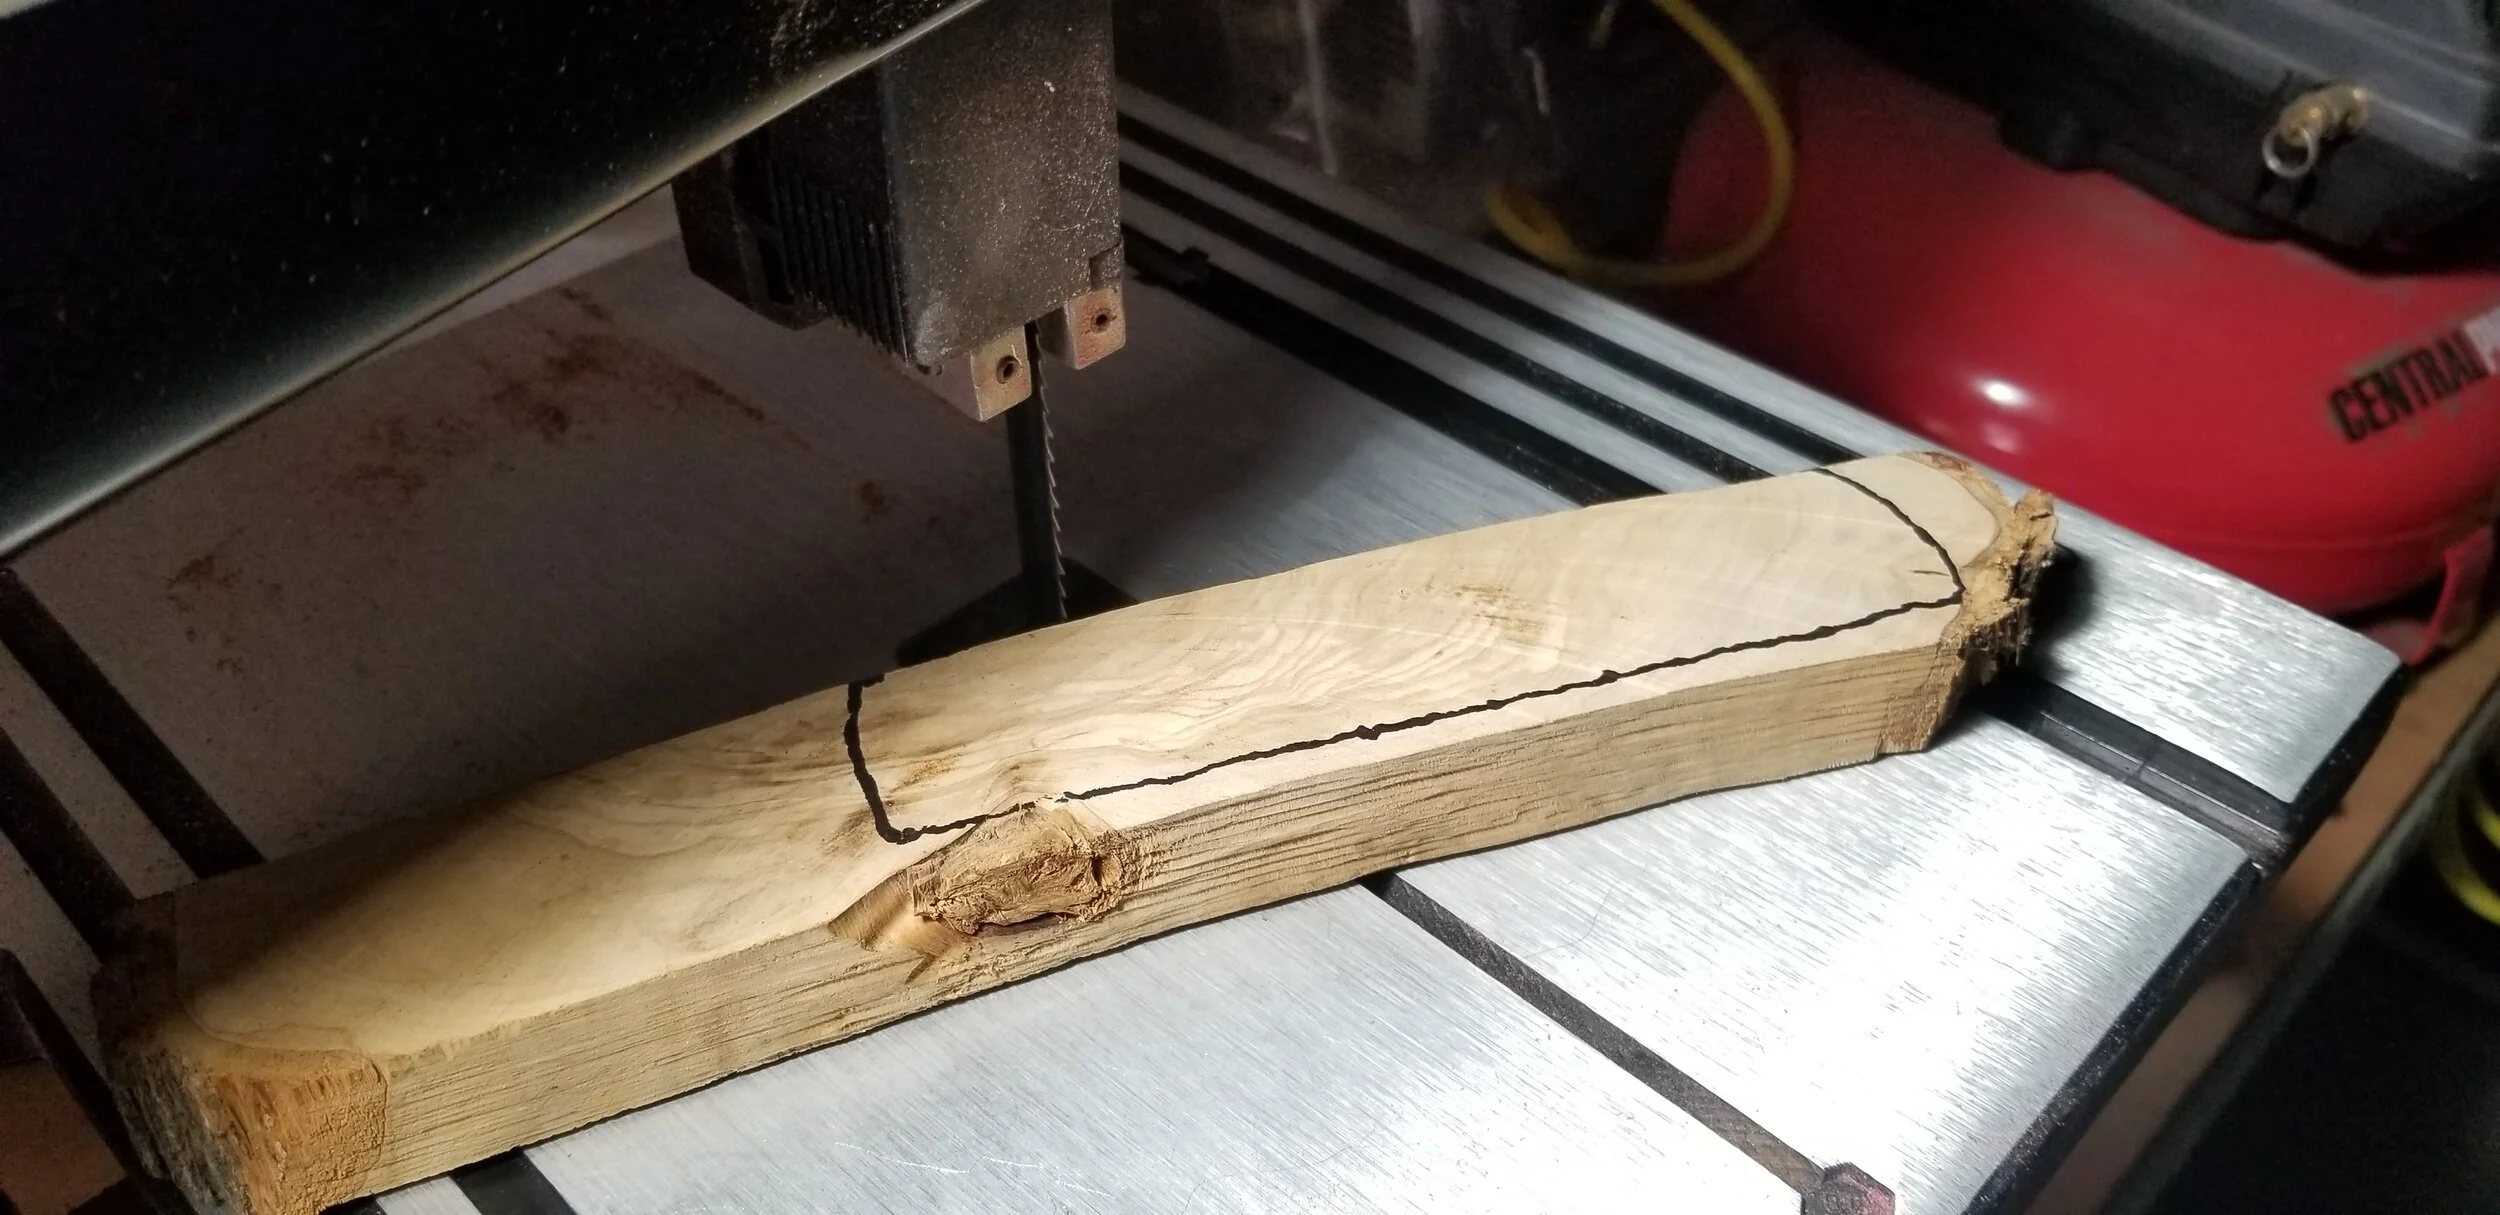
Once the general shape was cut, I cut down the length of the piece thus making two matching sides for the handle.
I set this aside, and returned my attention to the tang. I used a precision compass to mark out 3 equally-spaced holes that I drilled out to accomodate some brass dowels I intended to secure the mesquite to the tang with.
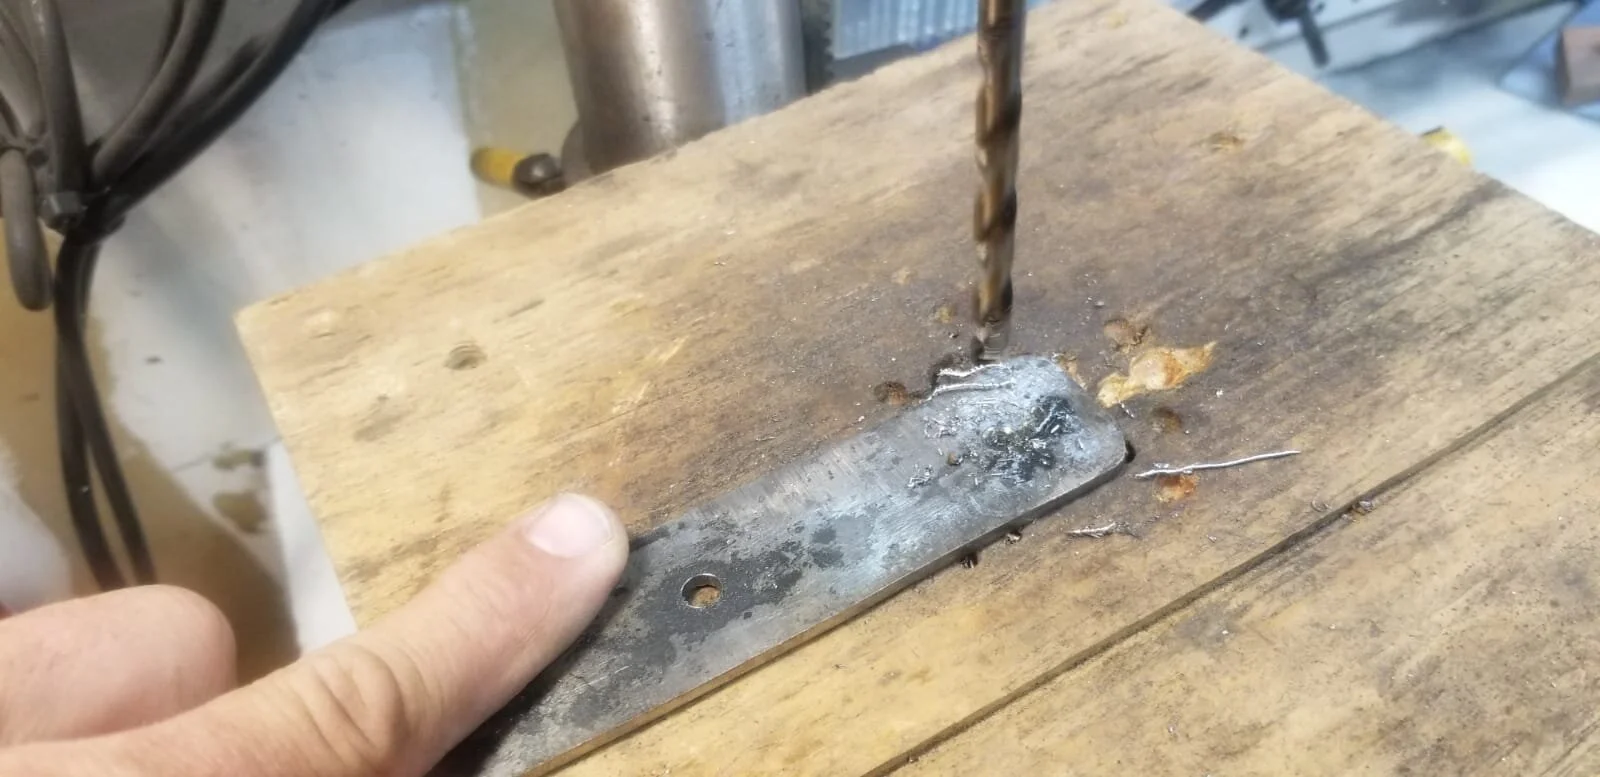
Drilling holes in the tang.
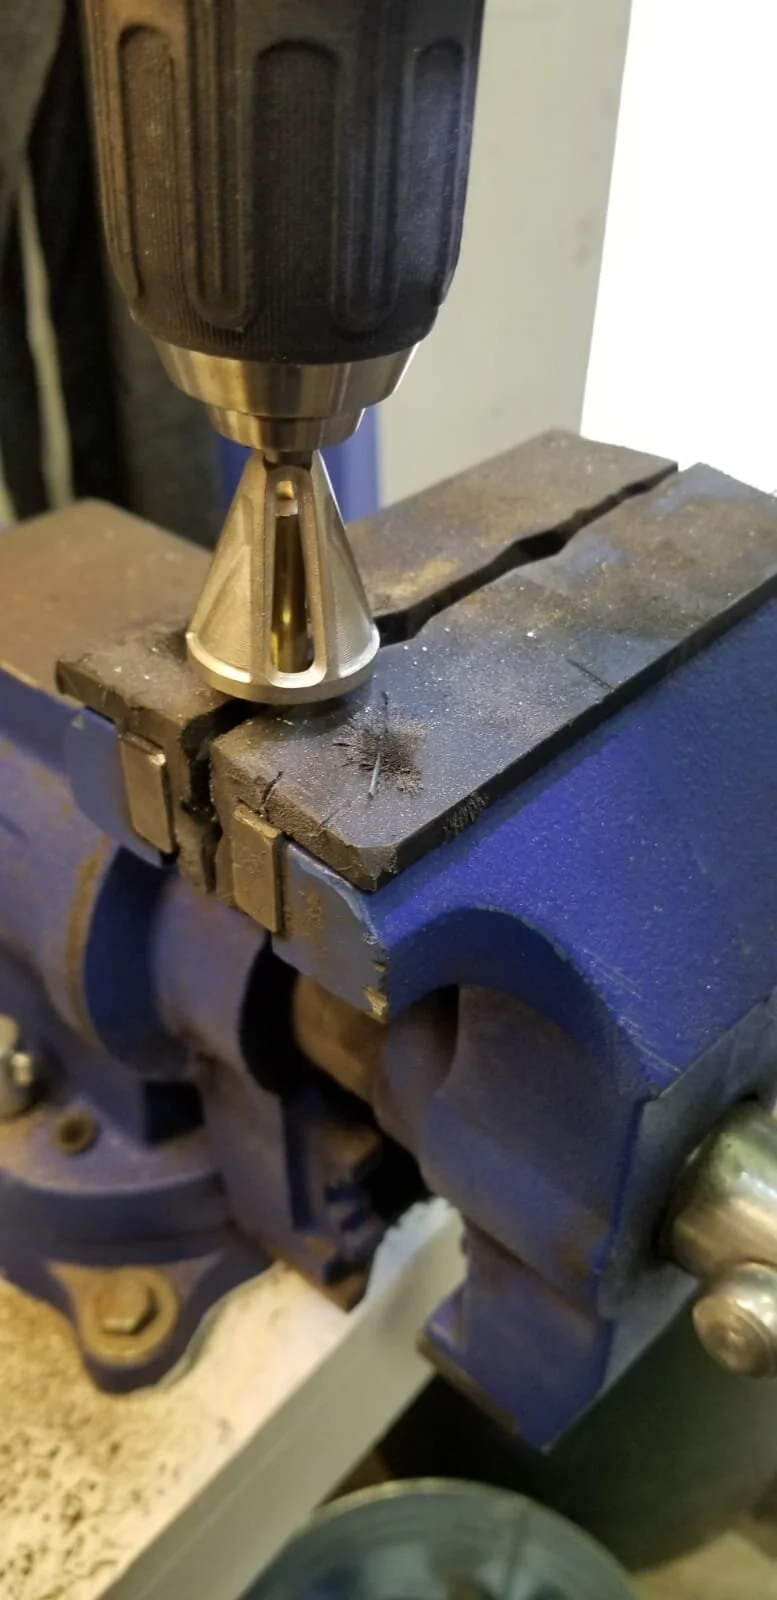
Chamfering the brass dowels I cut for the handle.
Next, I drilled holes through the mesquite to match the holes in the tang. I cut 3 equal-length pieces of brass, and lightly chamferred the ends to ease insertion through the mesquite, and tang.
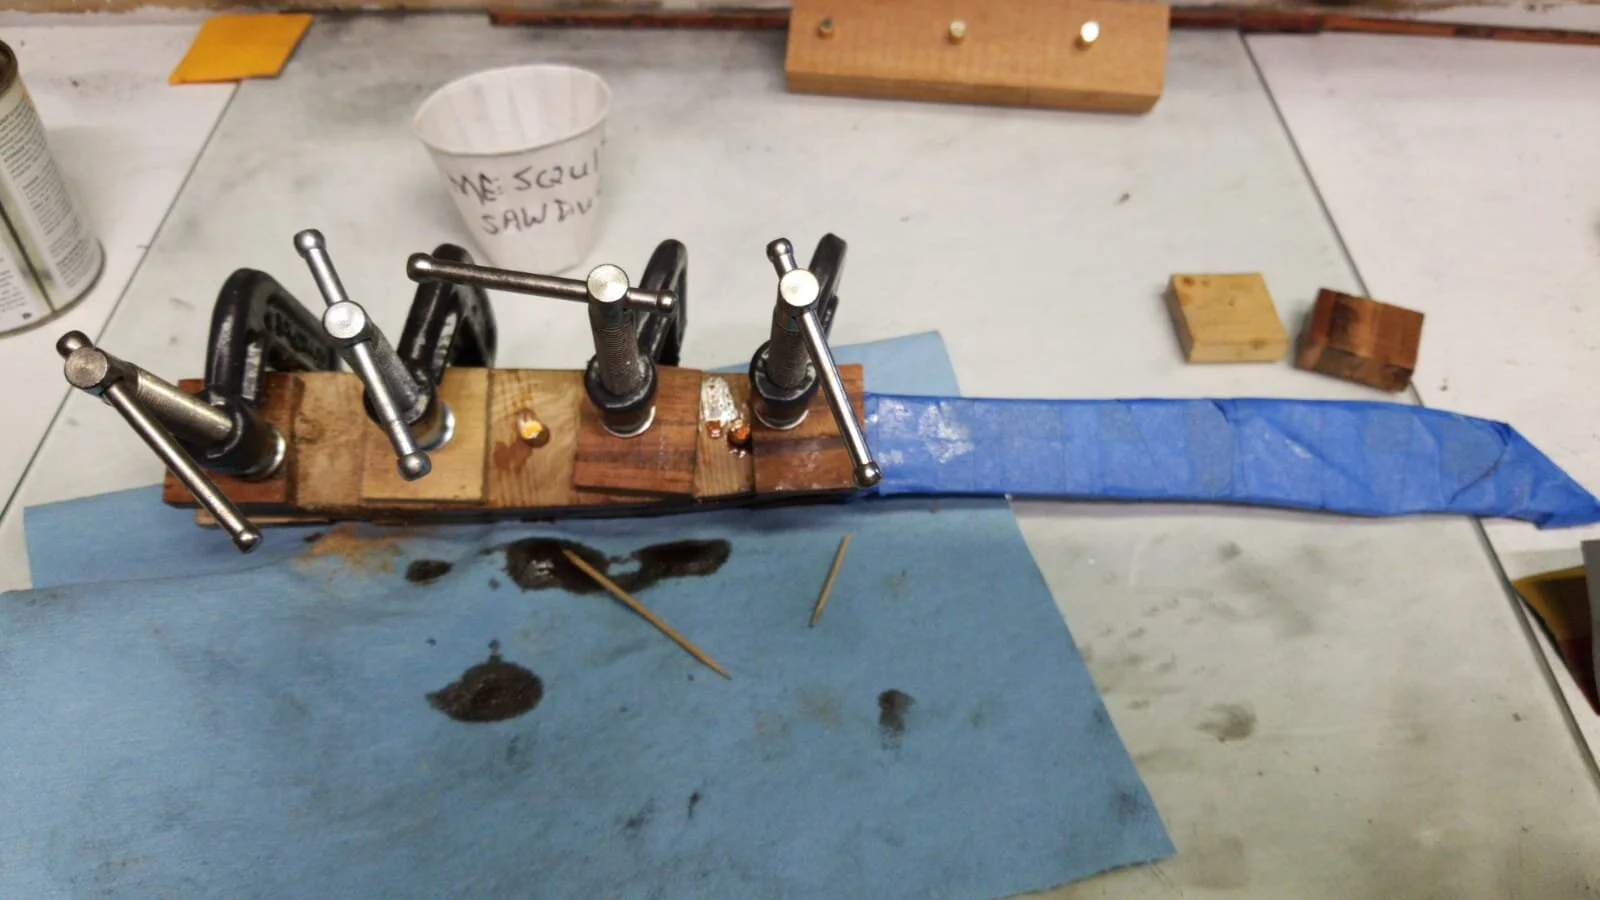
Next, I mocked up the piece to make sure everything fit right, then covered the blade with painters’ tape to protect it. Next, I mixed up some epoxy, and got to gluing it all together, holding it all in place with some clamps.
I let the epoxy set overnight. In fact, I let it set for a week because I was too busy with other projects to get to it!
I’m no expert by any stretch of the imagination, so the handle looked like poop while it was setting (see below), but I knew I’d be able to hide all that ugliness with some rigorous sanding, and plenty of time!
When I got back to having time to work on the knife, I removed the clamps, and blocks of wood I used to protect the handle from the clamps, then got to sanding. I started on the belt sander, then once I had the big stuff removed, switched to good old-fashioned hand sanding. I took it to a 1000 grit, so it felt nice and smooth. I have big hands, so made a fairly thick handle. It’s big, and felt good in my hands.
I then put some dual-boiled linseed oil on the handle, and let it soak for a couple minutes. I wiped the excess away, and repeated. I then wiped the blade down with a lint-free shop towel dipped in extra virgin olive oil, and took this photo:
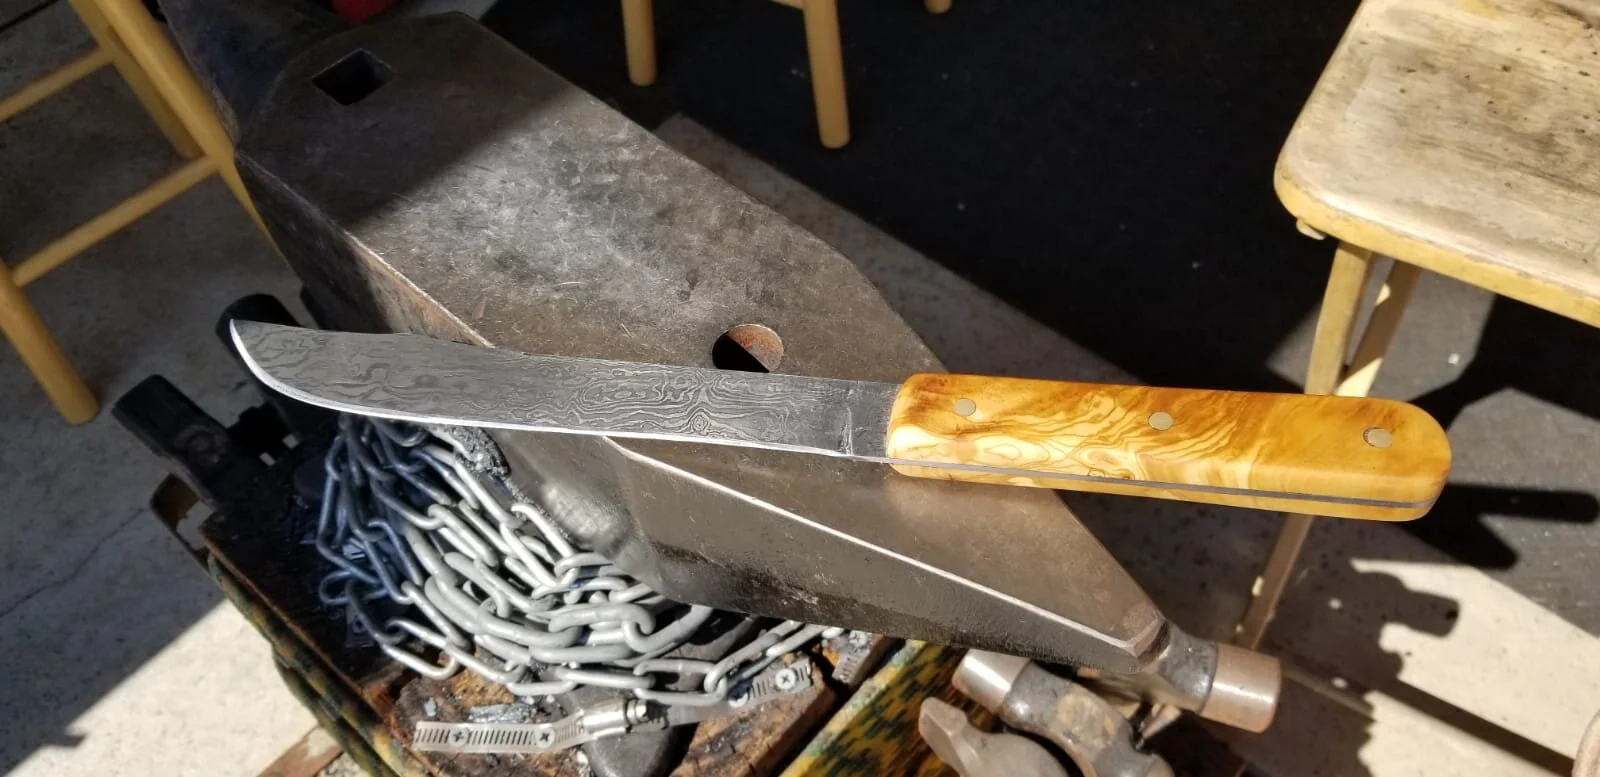
I felt the pattern in the steel matched the pattern in the mesquite rather nicely!